Summer of Sourdough
Summer is so close. Â And with all those wonderful warm breezes blowing in the windows of your home it’s a great time to get a sourdough culture started. Â Hopefully it will become inhabited by a few of the beneficial microbes accompanying those nice smelling breezes! Â Then you can start baking amazing sourdough breads that truly feature a piece of your locale! Â Of course in reality a sourdough culture doesn’t actually need wild organisms from the air because many of them are already present on the flour that you will use to start the culture!
Sourdough Habits and Techniques
The journey to understanding a sourdough culture and its uses has been a long one for me. What I mean is that it took a long time for me to really understand both what a sourdough was and how to use it. Even now there is some mystery in it all and I can’t always explain why some batches of bread turn out better than others, but I do feel like the process is much clearer to me than it was nine years ago when I first started playing around with it.
Initially I thought a sourdough should be fed sugar. That was a mistake. I also thought a sourdough should smell bad. Hmm, that also was a mistake. Let’s see, I also thought a sourdough had commercial yeast added to the culture. So if you can picture, I kept a container full of a foul smelling, strange looking, pretty much useless batter that I would add sugar, flour, water, and yeast and periodically attempt to incorporate into breads. If I had been willing to do some reading I could have been baking delicious sourdough breads much sooner. Sadly in my post-college resourcefulness I had the impression that most knowledge could simply be learned through experience and experimentation, which was not altogether wrong but missed the obvious point of “don’t reinvent the wheel.â€
Strangely my interest in sourdough never had much to do with health, but the more I’ve read in recent years the more I’ve been convinced it’s a healthy decision. Initially I was drawn to sourdough for the self-sufficiency of it as well as the challenge. There was something very alluring to me about acquiring wild yeasts and putting them to work in my kitchen, in exchange for providing them with some nice room and board and the chance to perpetuate themselves indefinitely.
Back to the point of health, it seems that the slow process of souring and proofing (allowing the dough to develop and rise) allows for several beneficial things to happen. One result of the souring is that phytates are neutralized. These compounds are initially present in the dough and block the body’s ability to easily absorb vitamins and minerals from flour.  Once neutralized the body has access to those vitamins and minerals, which is good, right? The lactic acids that make the bread sour also help to lower the glycemic index of the bread, by slowing the release of glucose into the bloodstream. The lactic acid also helps to make gluten (everybody’s favorite food villain) more digestible. [sources] Given that members of my extended family have gluten sensitivities, including celiac disease, I’m always conscious of gluten and want to take steps to deal with flour in such a way that it is as healthy and nourishing as possible.
So, sourdough is healthy, which is good, but that’s not why I make it every week. I make it every week because it is delicious and magical. I make it because it connects me to the past and the world around me. And how cool is it that tiny microorganisms are willing to collaborate to make something as awesome as a big loaf of tasty and nutritious bread?
First, Just Make Some Bread from a Trusted Recipe
Before you start experimenting like I did and trying to figure out how to do sourdough by trial and error it’s worth establishing a few basics, by learning the following things:
- How to bake simple yeast breads.
- How to bake delayed-fermentation breads.
- How to bake whole-grain breads.
To learn those three things I recommend starting with one or two of Peter Reinhart’s books, which should be at your local library (and if they aren’t you should request them, that’s how I get all my books!):
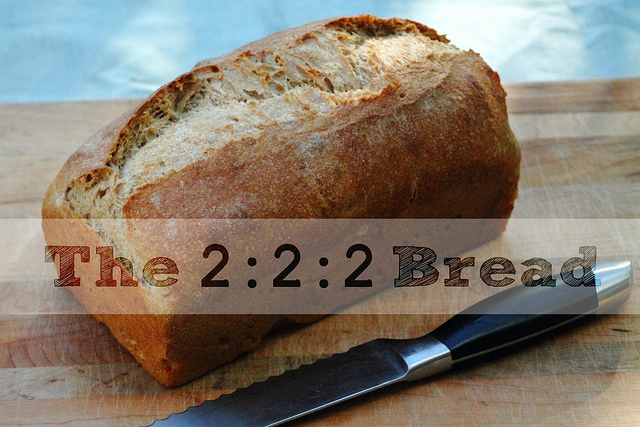
Or if you don’t want to read a whole book about baking then at least try a simple recipe for a yeast bread that incorporates a few techniques from those books, like this one, the 2:2:2 Bread :
Now Start Your Starter
While there is something very satisfying about starting your own sourdough starter it’s also nice to get right down to business baking a sourdough bread, and the fastest way to do that is to get a starter from a friend. This is not only convenient, it’s also reassuring because you can know for sure that the starter is viable and you can even test the results by tasting your friend’s bread (so if you’re in the KW area I’m happy to share some starter with you, just leave a comment and let me know!). But if you really like doing things from scratch then by all means make your own sourdough starter. It will take you 5-7 days:
Day 1
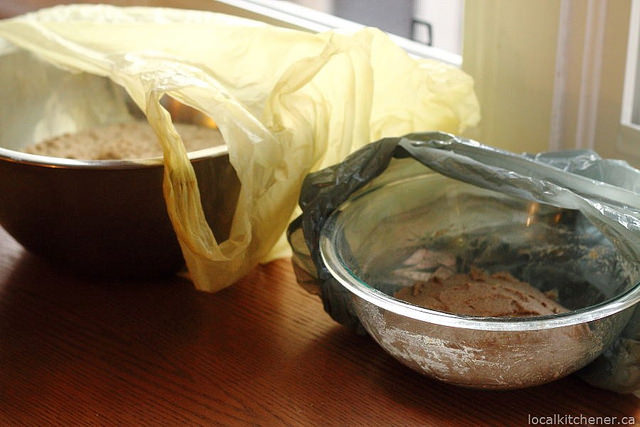
- Mix 3 ½ tablespoons whole wheat or rye flour with ¼ cup water or unsweetened pineapple juice (see here for why pineapple juice is a good idea ). Cover loosely with a plastic grocery bag or plastic wrap, and leave at room temperature.
- Stir the mixture 2-3 times daily for 48 hours.
Day 3
- Add 2 tablespoons whole wheat or rye flour and 2 tablespoons water or pineapple juice to the original mixture (which we will henceforth call “the spongeâ€). Cover again.
- Stir 2-3 times a day for 48 more hours.
Day 5
- Add 5 tablespoons whole wheat or rye flour and 3 tablespoons water (no more juice) to the sponge.
- Repeat with the daily stirrings and by now the batter should start getting bubbly.
Day 6
- Get rid of half of the batter by making sourdough pancakes . Add 7 tablespoons flour and 3 tablespoons water to the remaining sponge.
- Let the sponge rise for a day (could be a bit more or less) and then it’s ready to be used to bake a bread. If you don’t use it transfer it to the fridge in a covered container (I like these containers ).
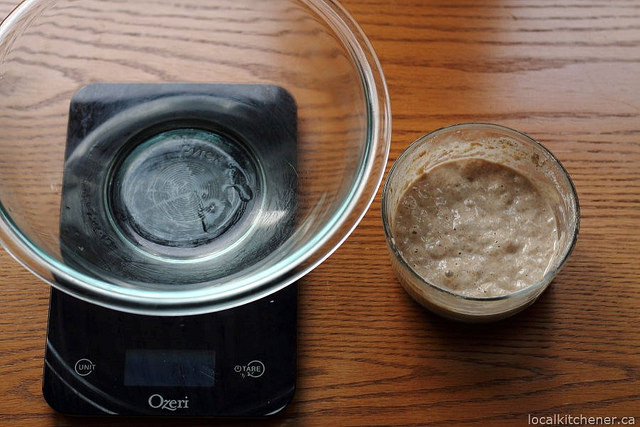
(Above) A happy sourdough culture ready to be weighed to make some delicious bread!
Happy Sourdough Equals Happy… um, What Rhymes with Sourdough?
I bake bread about once a week, usually on Tuesdays. This means the process usually begins on Monday night. When I worked full time as a teacher I did my baking on Saturdays, thus I would begin on Friday night. You have to find what works for you. I don’t get stressed if I can’t bake some weeks, but I am aware of the sourdough starter’s needs, which sometimes include being fed even if I’m not baking. I figure it can last a few weeks in the fridge without being fed, but it’s happier being fed on a consistent weekly basis.
Our other family secret for maintaining our sourdough culture’s health is to use the starter to make sourdough pancakes , which we have at least once a week. Pancakes are much more forgiving than sourdough bread because they don’t depend on the sourdough for rising, but use baking powder and soda. The sourdough simply helps the dough to be more nutritious and tastier, as explained above.
When our starter needs to be fed and there’s no time for baking I simply take it out of the fridge, discard some if I have more than a few tablespoons, then add some flour and water.  How much? Well the goal is to at least double the starter in size, so if I have about 2 tablespoons of starter I’m going to add at least one tablespoon of water and one of flour. My preferred flour for feeding is rye, but I change it up to keep the starter adaptable. Keep in mind that you can always add commercial yeast to a sourdough bread, but there is a huge amount of satisfaction that comes from baking a bread using only wild yeast for leavening. Thus a healthy starter is very important.
Standing on the Shoulders…
My current go-to sourdough bread recipe is sort of a combination of several baker’s recipes. I have been influenced by the great bakers Peter Reinhart, Chad Robertson (I’ve just requested his latest book, Tartine No. 3 , for our library), and the author Michael Pollan (who while not being a professional baker, knows how to make a great sourdough, and spends over a hundred pages describing the process, science, and history in his latest book, Cooked ). The recipe that follows is influenced by all three authors:
Â
Multigrain Sourdough Bread ( Download the recipe as PDF )
Makes 2 large loaves
Ingredients (I recommend a scale, not just for precision, although that is very important to achieve consistent results, but also for the ease of not having to use measuring utensils):
Sponge
- 25g starter
- 100g whole wheat or rye or spelt flour
- 100g water
Soaker
- 200g whole rye flour
- 200g spelt flour
- 200g other grains (I enjoy using “spent grains†from beer) but oats, barley flakes, and other whole grains will work here)
- 600g water
Final Dough (next day)
- 300-400g all purpose flour
- 50g oil (this is optional, and I mostly add it when making sourdough ciabatta or pizza dough)
- 10-15g salt
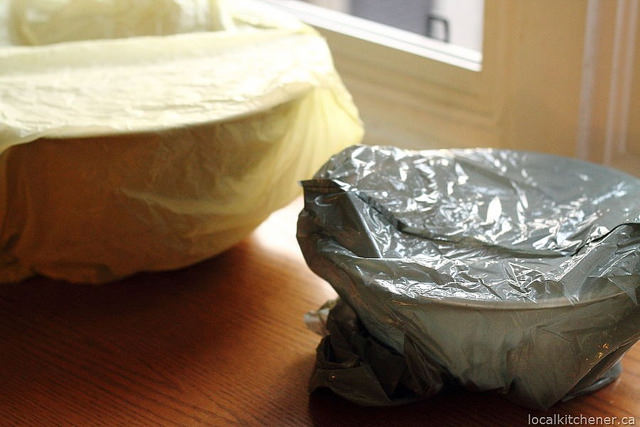
Begin by making the sponge and soaker. Mix both together in separate bowls, cover (a plastic grocery bag is great for covering bowls of sourdough, rather than dealing with plastic wrap) and allow to sit overnight. (These can also be left in the fridge for up to three days.)
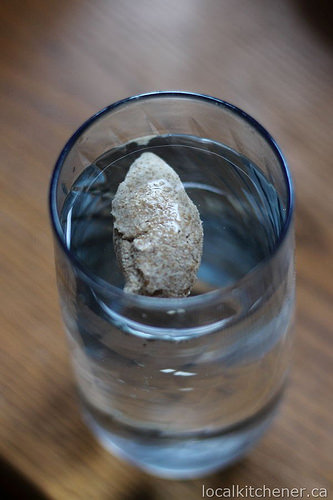
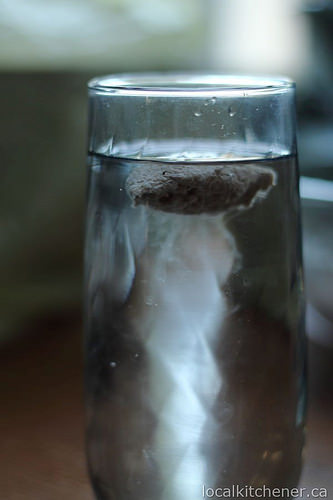
In the morning mix together the sponge and soaker. (You can test your sponge for its yeastiness by taking a small piece of it and putting it in a cup of water. If it floats you’re good, if not then you can add ½ tsp. of yeast). Add the flour, oil, and salt and mix together until all of the flour is incorporated. I do this with a mixing stick (something a family member made on a lathe, just a smooth stick of wood), but if you’re stand mixer is a good one with a dough hook it should be able to handle this).
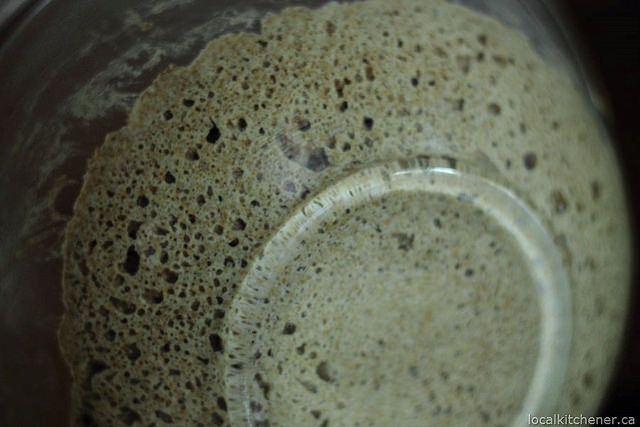
(Below) Checking for bubbles and doing the “float” test:
Let the dough sit for 1 hour. Then use wet hands to grab the dough, pull it up and fold it on itself. Do this four times, reaching from each side of the dough, always folding it back on itself. This is called, fairly obviously, “the stretch-and-fold method.”  It is demonstrated here: The Stretch and Fold Technique from Peter Reinhart .  If your dough is way too sticky add more flour.  You can add a little flour every time you stretch and fold.
Set your timer for another hour (it’s okay if it’s a bit longer too, sometimes I forget the timer and just do it when I think of it), and repeat the stretch-and-fold method.  Repeat this process (and the hour wait) 1 or 2 more times, for a total of 3 or 4 strech-and-folds, and yes, this will take a good chunk of time.  The choice to do 3 or 4 sets of stretch-and-folds depends on how your dough is responding.  After 3 sets if the dough seems to be rising and holding its shape well then you can move on.  If not then you can do a 4th set.
After the last set of stretching and folding let the dough sit one more time for about 30 minutes.  Now it’s time to shape the dough for its final rise. You have a few options:
- Classic bread loaf. Divide the dough into two equal pieces, flatten each on a counter into a rectangle the same width as your bread pan. Roll up the bread and pinch the seam closed. Roll it back and forth a bit to make it even and then place it in an oiled bread pan, cover with a cloth and let it proof (rise). Before baking score the loaf down the center with a sharp knife.
- Batard: Also sometimes called a “torpedo†this is like a baguette that hasn’t been stretched out. Divide the dough into two equal pieces, flatten each on a counter into a rectangle. Fold the top half of the dough to the middle, then fold the bottom half over that, pinching shut the seam. Roll the dough back and forth until it is about 8-10 inches long. Place it on floured parchment paper, cover with a cloth, and allow to proof. Before baking score the loaf down the center with a sharp knife. See a full video here .
- Boule: This is a big round ball of bread. Divide the dough into two equal pieces, flatten each on a counter into a square. Pull the corners of the dough to the center, then flip it over and using one hand rotate the dough and with the other hand push the edges underneath toward the centre, which stretches the outer surface of the bread tight, creating good surface tension. Flour the dough, then place it upside down in a floured bowl that is slightly larger than the bread. Cover it with a cloth and let it proof. When proofed you will need to move the dough from the bowl to something that can transfer it to a preheated baking stone, like a floured pizza peel. (I use a super peel which I love. See it in action here .) You can also turn the dough over onto a lightly floured baking sheet and bake it on there. In both cases make sure to score the loaf before baking, either in a cross shape, or in a square shape. See a full video here .
- Ciabatta: Probably my favorite method, because it is the hardest to mess up. Divide the dough into 4 pieces. On a floured surface stretch a piece of dough and fold one end to the center, then the other end to the center. Do this with all four pieces of dough, let them rise on the floured surface until almost doubled in size. Once the dough has proofed, pick each piece up with floured hands, flip it over and stretch it a bit and place it, seam-side down on a peel or baking sheet. Transfer to the a stone in the oven or bake on the baking sheet. Ciabatta cooks much faster than the larger loaves above, so set a timer for 15 minutes, rotate the loaves, and then 5-10 minutes more.
In all three cases you let the dough proof until it is ready to bake. Usually with a sourdough this takes about 1-2 hours. The dough is proofed (risen) when it has almost doubled in size. Another way of checking is by poking it with your finger—if it leaves a dent it’s ready, if it fills back in quickly it’s not ready. Before the dough is proofed preheat the oven to 500 ◦ F. If you are going to bake on a stone make sure it is in the oven. When the dough is proofed place a pan or baking sheet on the lowest rack of the oven. Pour one cup of very hot water into the pan and close the door, it will be very steamy but don’t take your clothes off or do, it’s your choice.
Lower
the temperature to
450
â—¦
F and bake for 20 minutes. Rotate the dough 180
â—¦
and bake another 15-20 minutes, until the dough sounds hollow when tapped on the bottom. If you have a cooking thermometer stick it in the bread, if it reads above 190
â—¦
F and comes out without any sticky dough on it the bread is done. Allow it to cool for at least 30 minutes before cutting into it.
Featured on:



June 24, 2014 @ 11:24 pm
Hi Jon, can you explain how you got to four stretch-and-folds? At the end of the first hour, you do one full set of stretch-and-folds. Then after another hour you do it twice. But then you immediately shape your dough after that?
June 25, 2014 @ 6:49 am
Hey Emily, you’re right that it was lacking clarity and missing a step. I’ve revised it a bit (see above). Mainly you do the stretch-and-folds a told of 3 or 4 times and then let it sit one last time before shaping. Sorry for not having this all more clear to begin with and thank you for pointing it out 🙂
June 25, 2014 @ 2:15 pm
Thanks Jon! I’ve been using a recipe that Karin posted on the Little City Farm blog awhile ago, and while I loved the simplicity, I wasn’t too fond of the crumb/flavour. So, I’ve started adapting it with some of the methods you posted and will probably keep experimenting. We just got a new oven with two racks, so I’m excited to be able to use a pan of water now (though I need to do more research on that technique since last time it made things… weird).
Emily recently shared… onwards and upwards
Weekly Cultured Gathering: July 5
July 5, 2014 @ 6:00 am
[…] will get this week rolling with the Summer of Sourdough by The Local Kitchener. How are your ferments doing this […]
August 21, 2014 @ 11:00 am
Thank you for this post… can’t wait till my own sourdough bread becomes edible! 😛
Maple recently shared… Aroma Cafe
September 2, 2014 @ 10:34 am
Hi Jon!
First of all, I just wanted to say that your website is so nice!
I have been baking simple yeast breads for a while, and am really excited about (ok, and sort of terrified of) trying to make my very first sourdough. I very recently moved to the KW area and was wondering if you would be willing to hook me up with some of your sourdough starter? I had originally been planning to make my own, but as you put it in your blog, I am also ready to get right down to business (and possibly spawn a sourdough monster).
Cheers,
Aleks
September 2, 2014 @ 8:17 pm
Hey Aleks,
I’d love to hook you up, not just to help you but as insurance for my own starter (the more I spread it out the more likely I can get some back if mine ever bites the dust!). And welcome to KW! I’m available most mornings and work in downtown Kitchener in the afternoon. Send me an email (localkitchener@gmail.com) so we can figure out when/how/where to connect.
December 14, 2014 @ 4:49 pm
Hi, Jon.
I got it into my head that I’m going to try to make sourdough bread, so I started reading webpages, lots and lots of webpages. I got the basic principles down, but I’m curious about how fussy I need to be with the starter. If all those people could do it for all those thousands of years, surely it can’t be that hard.
So I’m trying an experiment. I’m going to throw some flour and water together without giving any thought to all those suggestions out there and see what happens. I started today. You can read about my adventure at http://warren.gaebel.ca/blog/?p=7
Wish me luck. You know I’m going to need it.
March 20, 2016 @ 2:14 pm
Hi Jon
Just wondering what the all purpose flour is? Can I use rye or spelt as I have a wheat allergy.
Thanks
Heather
March 20, 2016 @ 2:18 pm
Hi Heather,
The all-purpose flour is just a standard grocery store wheat flour (not whole wheat). These days I have been using a blend of whole spelt, rye, barley and wheat with good results. The only thing that will make it difficult to work with the non-wheat grains is that they have less gluten than wheat and therefore will not create a dough with as much spring or stretch to it. It’s worth trying though! We make all-spelt sourdough pancakes and they turn out great. My experiments with all-spelt breads have been rather dense and crumbly.
Good luck!
-Jon
September 24, 2017 @ 9:35 pm
I would love to get a starter if you are still offering ??
October 26, 2017 @ 7:53 pm
Yes, sure thing! I’ll send you an email.